

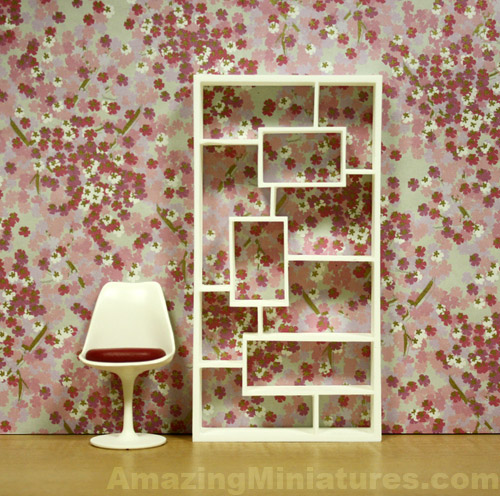
The Modern Bookcase in Plastic
So the scene above looks vaguely familiar, but can you spot the big difference?
I know, I know, the picture color is a bit washed out (sloppy editing), its missing the shelf items, and there’s the Tulip chair, but…. the big difference is that the shelf is actually a plastic reproduction!
It first started when I got a bunch of emails from a few people asking if I would sell that modern bookcase. Based on the amount of time I spent on it, I was (and still am) very reluctant to give it up. I thought about making more of them, but again, based on the time it took, I was (and still am) very reluctant to go through the cutting, sanding, assembly, and painting (and more sanding) process again. I could have made jigs to help with the cutting and assembly process, but the most time consuming part was the multiple sanding and painting passes (in tiny corners) that was the big turn off for me.
So I was brainstorming for ideas to make the bookcases quicker when a friend suggested buying a product called Smooth On that can make a mold of the original and then make a cast (copy) of it in resin (plastic).
What a wonderful idea! It sounds like such an easy process, right?
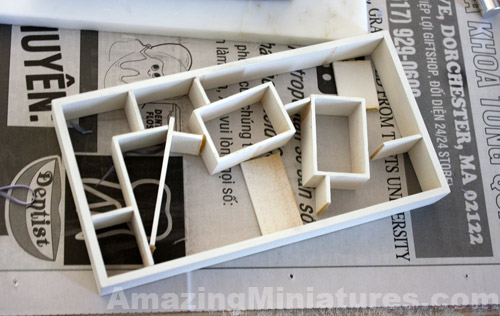
WRONG! This was what happened when I tried to remove the bookcase from the rubber mold. Yes, it broke my heart too. Luckily the damage was repairable.
The problem was due to the fact that wood is a porous material and I did not apply nearly enough of the ease release spray to make the removal of the item easier. I thought the paint on the bookcase made it impermeable enough, but you can see from the picture that even some of the paint was stripped off!
The reason why the bookcase is in pieces is because it would not budge from the mold without a whole lot of force. Force on such a delicate, tiny object makes it go smash. 🙁
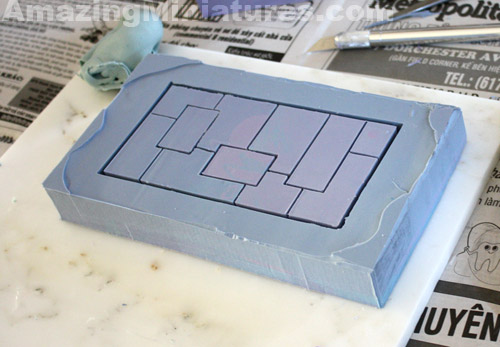
After wrestling the original copy from the rubber mold, this was what I was left with. It looks pretty good, but at this point, I was really, really mad at it for destroying my bookcase. I had to take a day off to blow off some steam and mourn. lol.
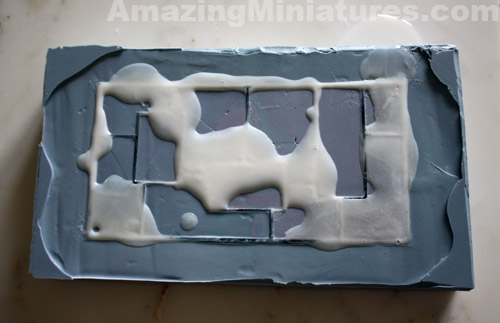
The next day (after repairing the broken bookcase), I attempted to make a resin cast from the mold.
Here are some tips if you ever try this:
- Read the directions very carefully
- Do this in a well ventilated area
- Wear gloves or other applicable protective gear
- You will probably prepare more resin than you actually need, so keep a spare mold handy to pour in the excess resin
- Work quickly (but carefully) because the resin hardens very fast
For my first ever cast (pictured above), I applied way too much ease release as a knee-jerk reaction from what happened to the original bookcase. Sure the cast came out easily, but it was really uneven and rough due to the bubbles from too much ease release.
Unfortunately, I didn’t take any pictures of the first cast before I fixed it and gave it away.
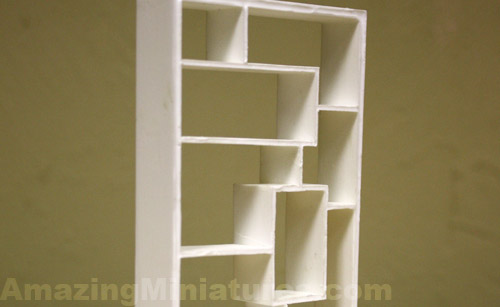
After a few weeks of casting a bunch and learning from trial and error, I did eventually get the hang of it.
The picture above is what the resin copy looks like after it was removed from the mold (after it curing in the mold for a few hours). Its a bit rough around the edges, but ain’t nothing that a spot of sanding can’t fix!
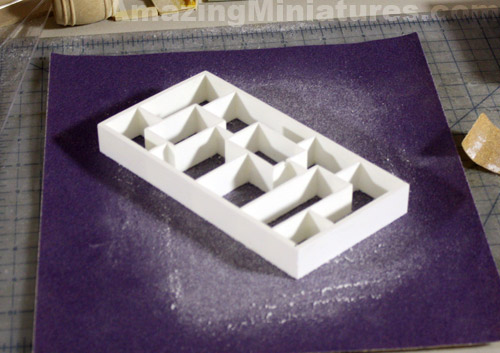
My least favorite thing to do. Ever.
Even though I hate sanding (with a passion), I do love the fact that the extra bit of effort really does make a big difference in the finished product.
Wearing a mask when sanding resin plastic is an absolute must.
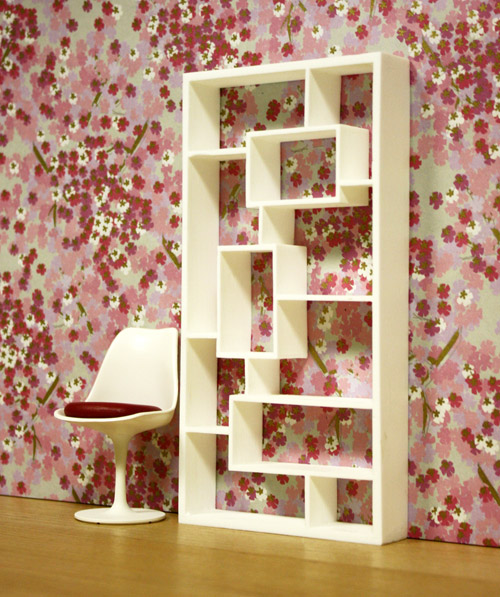
And here it is! The finished piece looks great next to the iconic tulip chair. The best part about this whole process is that I can now make this item relatively quickly, it is much sturdier than a wood piece, and I can share it with others on the cheap! The bookcase is most definitely going to hit my Etsy shop soon, so please keep an eye out for it!
Edit: Now that I posted this picture, I do notice a few imperfections (which means more sanding, ugh). And also a note to self: the photo looks really over-saturated now (more poor editing). I really need to get better lighting!
8 Responses