

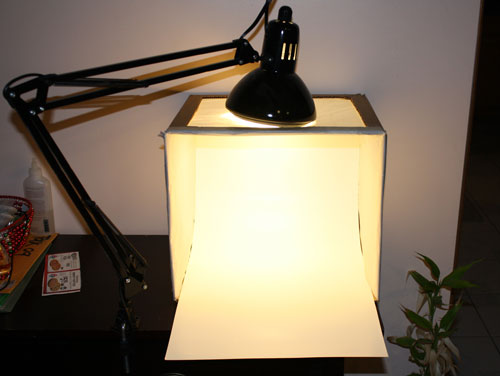
Make a Light Box for Miniature Photography for Under $5
Warning: this post is more so about photographing minis than minis itself!
Also – if you don’t want to read the summary of photography lighting, go strait to my directions below on making a homemade light box.

A big reason for my being such stickler for details with the minis I make and why I spend so much time sanding like a mad woman is because my other hobby (one among many) is photography. Close up photographs can really pick out the flaws and make miniatures look unrealistic.
After a few years dabbling in photography, you will pick up a few things. One of which is how important lighting is.
Compare Picture A:
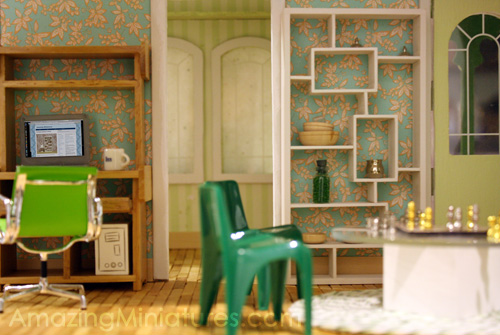
To Picture B:
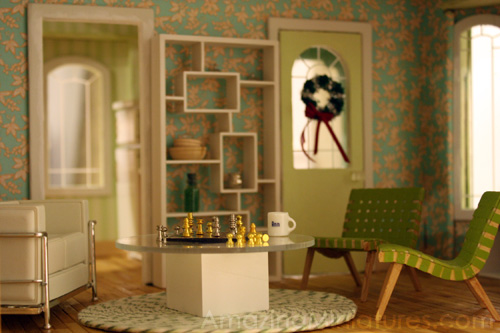
Picture B is clearly the superior image though it is of essentially the same scene. Why?
Picture A is illuminated with direct lighting from the overhead pot lights in my living room. The shadow contrasted with the extra bright (and washed out) colors on the various surfaces makes the whole scene look rather harsh. You get the same harsh effect with flash photography, which is why I don’t like it very much.
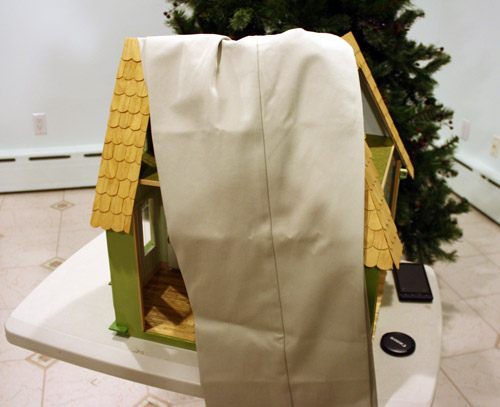
Picture B makes use of the indirect lighting of the overhead pot lights bouncing off the surrounding area, through the windows, and door ways. It makes the shadows much softer and IMO, makes the scene more convincing. Heck, if you’re wondering how I did it, the big secret was that I used my brother’s slacks to cover up the sides to allow the light to filter in through the windows and such.
This desired softer look is why you see photographers with those white umbrellas, or funky contraptions attached to their cameras. These contraptions are there to diffuse the flash to soften the shadows.
Another way to fake indirect lighting is to make use of light screens or tents. Here’s what one of these doohickeys look like: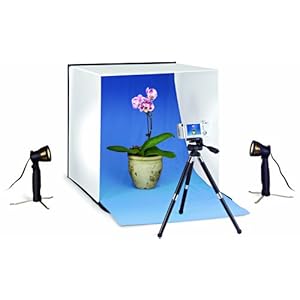
The lamps flank the sides of the box with the lights filtered by the screens which gives the final image a softer appearance. This is especially important if you sell anything anywhere and want to have professional looking photos. And if you’re wondering, yes, you can achieve just as good results with a point and shoot camera as you would an expensive DSLR camera.
But instead of paying the $50 bux or so to get the store bought light tents, you can make your own for under $5.. or free!
I just stuck in the “under $5” bit, because I am assuming you already have some of tools or materials needed to make this light box. If you had to go out and buy everything, then it would be more than $5.. and you would be better off buying a light box anyway! So lets assume that you have the supplies… 😉
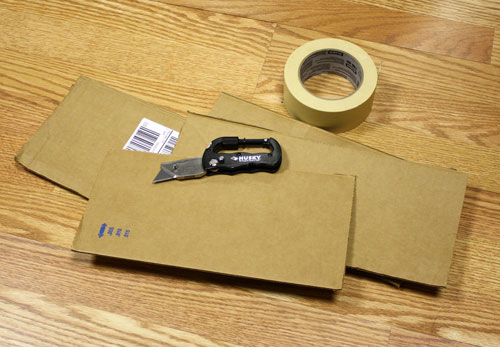
Here’s what you’ll need:
- Box cutter/Xacto knife/scissors/kitchen knife/something that will cut through a card board box!
- Masking tape/double sided tape/glue stick/something sticky
- A decent card board box
- White tissue paper/fabric
- Poster board/fabric
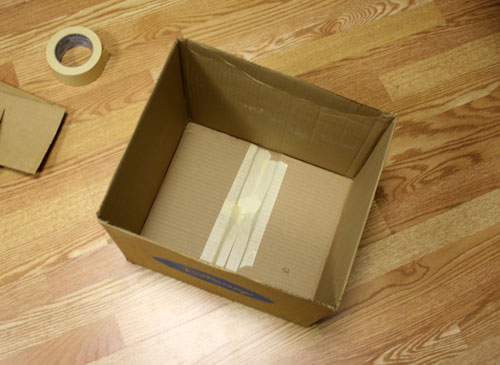
Step 1: Tape down one side of the box to make it nice and sturdy and chop off the entire other end of the box.
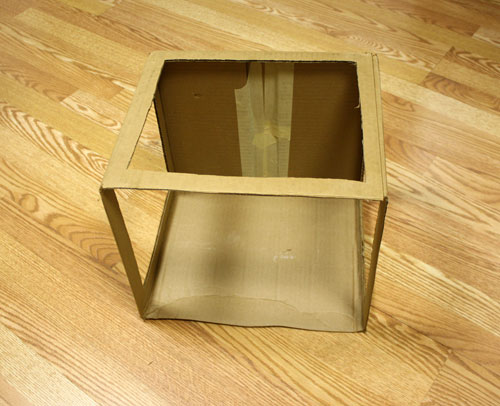
Step 2: Cut windows 1″ to 2″ from the corners on the left, right, and top of the box.
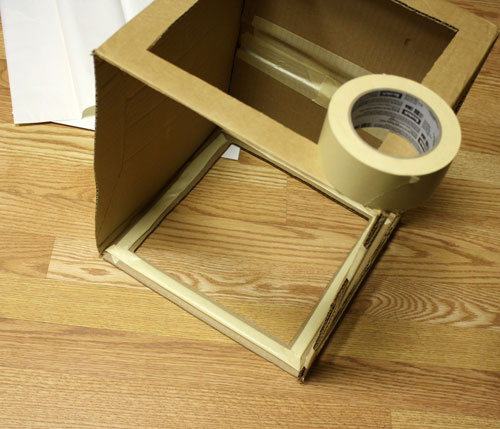
Step 3: Tape the inside of the windows – double sided tape or a glue stick works best here. I did not have any at hand so I folded my masking tape to have the adhesive side out on both sides.
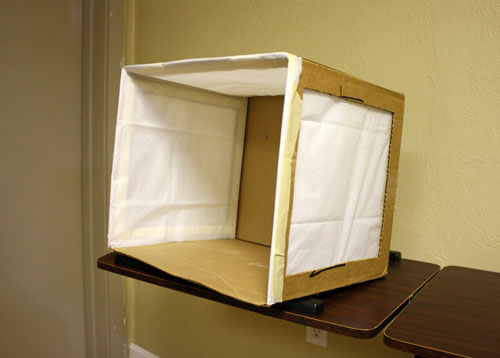
Step 4: Add in the white tissue paper. You may want to cut it to size first. Use the exterior to measure. I used two layers of tissue paper.
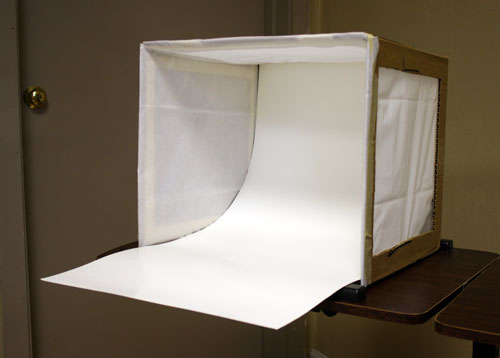
Step 5: Using the double sided tape/glue stick/masking tape, adhere the poster board to back of the box. I taped the poster board from the top to the middle of the box so it will stay put.
Step 6: Add lighting to taste!
This was a quick setup for the photo. I don’t normally set my lighting this way. I prefer two tall desk lamps pointing down a few feet away from the box. Normal overhead lighting can be used for the top – though if you do this, be sure that there is no direct light on the object. Also, keep in mind, you can really do just about any lighting configuration and the pictures can come out great. Just experiment!
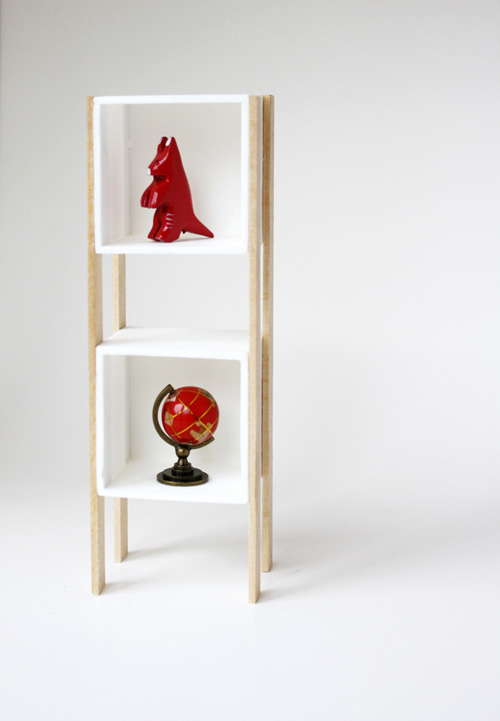
Voila! This photo was taken in the evening, with use of a home made light box, two lamps, and no flash.
I hope you enjoyed this crash course on photography lighting! It was fun writing it. Be sure to let me know if you have any questions!
8 Responses